
In this blog, I will describe the process of creating an Microsoft Enterprise Certificate Authority – Subordinate CA.
Introduction
The Subordinate CA is authorized by the Enterprise Offline Root CA to issue the certificates. Unlike the Offline Root CA, the Subordinate CA is joined to the domain before configuring the Active Directory Certificate Services (AD CS).
Step-by-Step instructions to install and configure the Offline CA can be found in my blog named “Install and Configure Microsoft Enterprise Certificate Authority – Offline CA” .
Build and Configure Subordinate CA
Following are the steps involved in installation and configuration of a Microsoft Enterprise CA - Subordinate CA: –
1. Follow these steps to install Active Directory Certificate Services (AD CS) Role: –
1.1. Logon as Enterprise Admin user account and start the Server Manager. Click on Add role and features.

1.2. Click Next to continue with the wizard.

1.3. Select Role-based or feature-based installation and click Next.

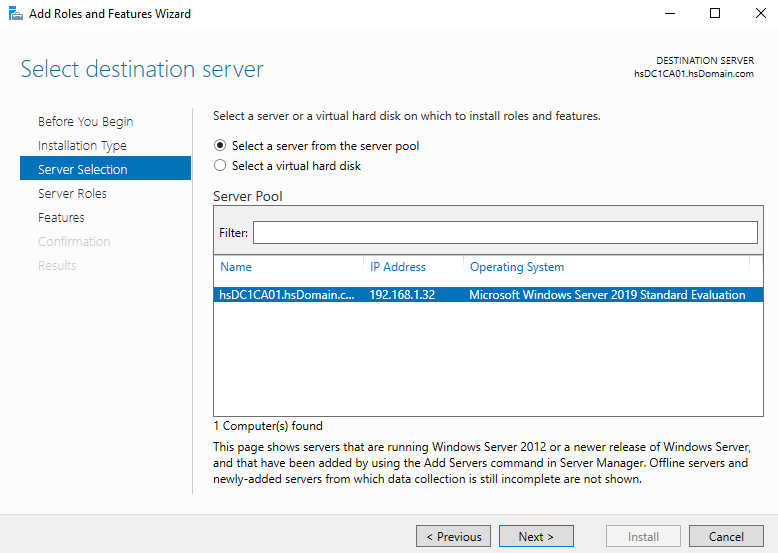
1.4. Make sure the correct server is selected. Then click Next.
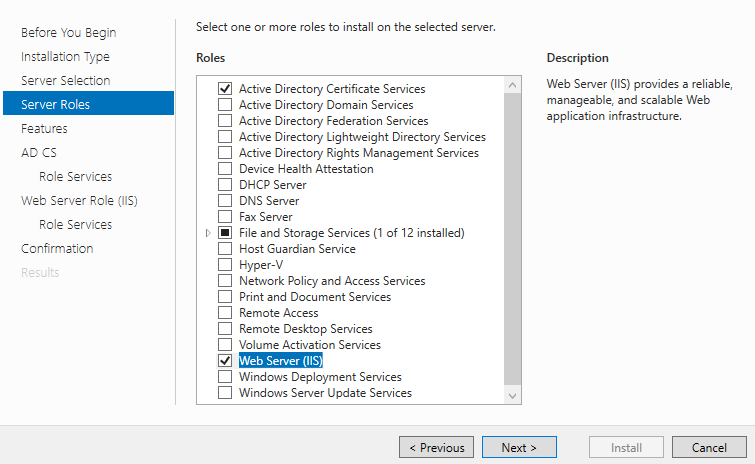
1.5. Select Active Directory Certificate Services

1.6. Click Add Features to accept the installation of required feature related to the selected role. Make sure Include management tools (if applicable) is selected.

1.7. Click Web Server (IIS).

1.8. Click Add Features

1.9. Click Next.
1.10. Click Next.
1.11. Click Next.

1.12. Leave only Certificate Authority checked and click Next.

1.13. Click Next.
1.14. Select Basic Authentication and Windows Authentication. Then click Next.

1.15. Click Install.

2. Once the installation is complete, continue with the configuration process: –
2.1. Click on Configure Active Directory Certificate Service on the destination server link.

2.2. In the ‘Credentials’ box, type the Enterprise Admin account credentials. Click Next.

2.3. Select Certificate Authority and Click Next. Only ‘Certificate Authority’ option should be available, since this was the only option selected during the installation.

2.4. Select Enterprise CA and click Next. Note: If the option ‘Enterprise CA’ is greyed out or not available, then check whether the server is joined to the domain or not.
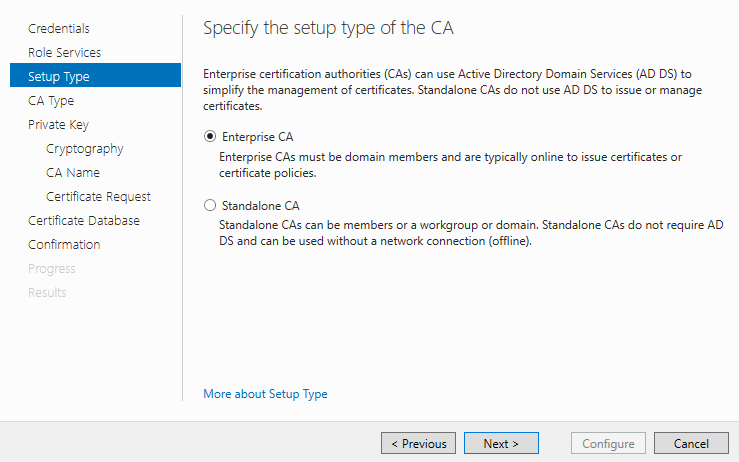
2.5. Select Subordinate CA and click Next.

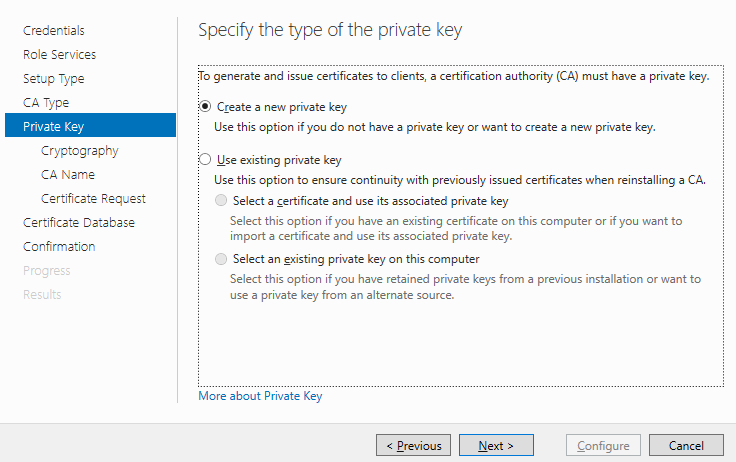
2.6. Select Create a new private key and click Next.
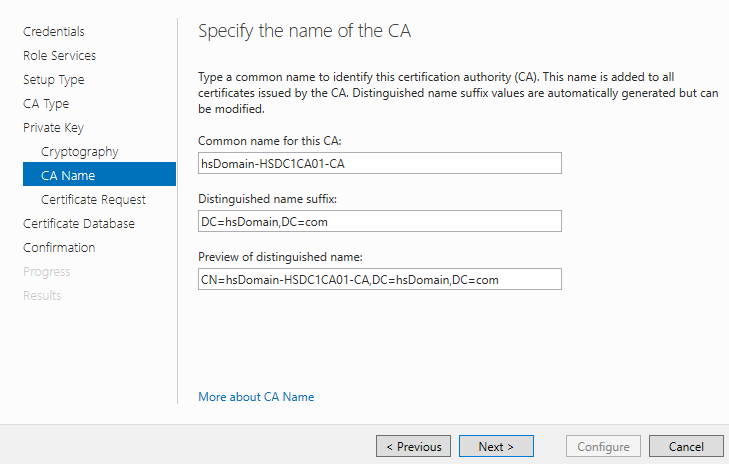
2.7. Leave all defaults and click Next.

2.8. Leave all defaults and click Next.
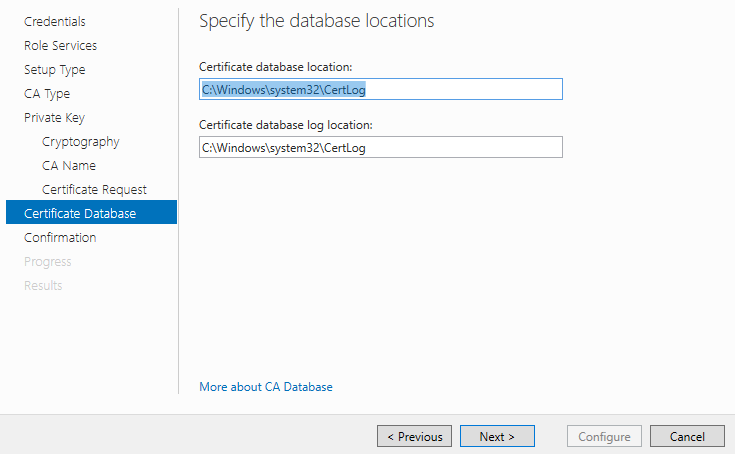
2.9. Leave all defaults and click Next.

2.10. Leave all defaults and click Next.
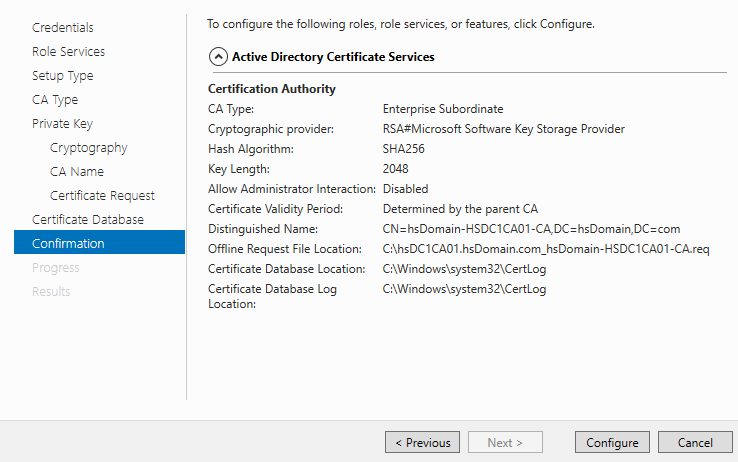
2.11. Verify all the information and click Configure.
2.12. Click Close. Note: The warning displayed on this screen indicates that a valid certificate needs to be obtained from the Offline Root CA, in order for this Subordinate CA to be operational.

2.13. Logon to the Offline Root CA and browse to “c:\windows\system32\certsrv\certenroll” and copy the three files from this folder.

2.14. Logon to the Subordinate CA and browse to “c:\windows\system32\certsrv\certenroll” and paste the three files that were copied in the previous step.

2.15. Right-click the root certificate and click on Install Certificate.

2.16. Select Local Machine and click Next.

2.17. Browse to Trusted Root Certificate Authorities and click Next.

2.18. Click Finish.

2.19. Click OK.

2.20. Create a new folder, called CertEnroll at “C:\inetpub\wwwroot”

2.21. Copy the Offline Root CA Certificate and the Certificate Revocation List from “C:\Windows\System32\CertSrv\CertEnroll” to “C:\inetpub\wwwroot\CertEnroll”

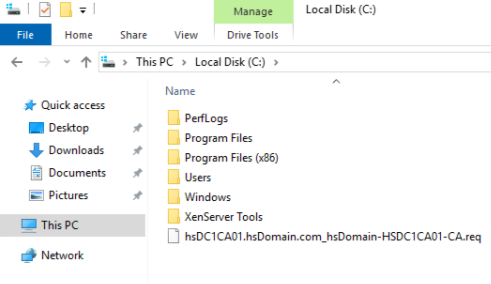
2.22. Browse to “C:\” and copy the .req file from this location and paste it on the “C:\” of the Offline Root CA.
2.23. At the Offline Root CA, open Certificate Authority from Start → Windows Administrative Tools. Right-click at the name of CA and select All Tasks → Submit new request.

2.24. Browse to the previously pasted .req file and click Open.

2.25. Click Pending Requests and Issue the cert by right-clicking on the cert.

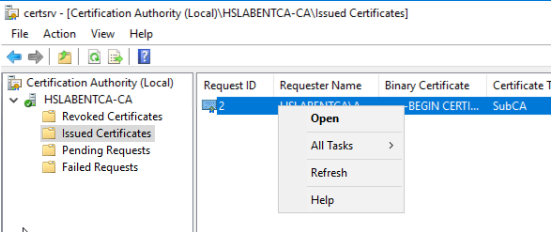
2.26. Click on Issued Certificates. Right-click on the Cert and click Open.
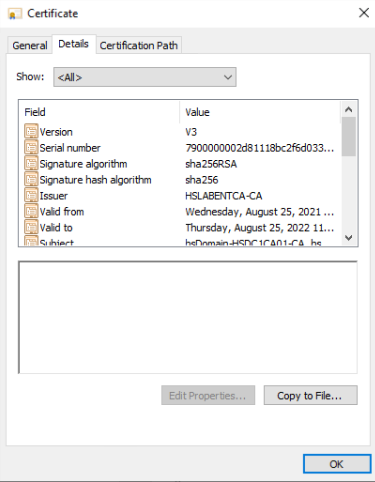
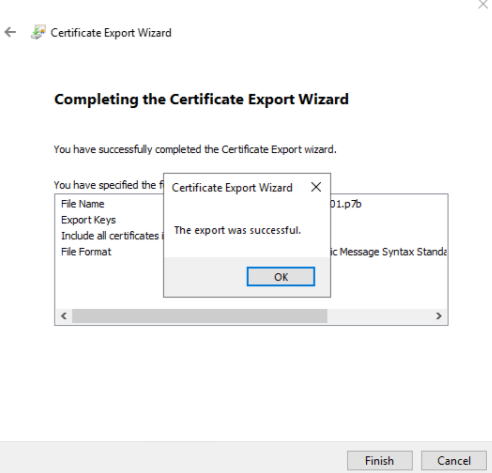
2.27. Click on the Details tab and then click Copy to File…
2.28. Click Next.

2.29. Select ‘Cryptographic Message Syntax …’ and make sure ‘Include all certificates …’ is selected. Click Next.

2.30. Provide the name and location to save the cert.

2.31. Click Finish.

2.32. Click OK.
2.33. Copy this certificate to the Subordinate CA.

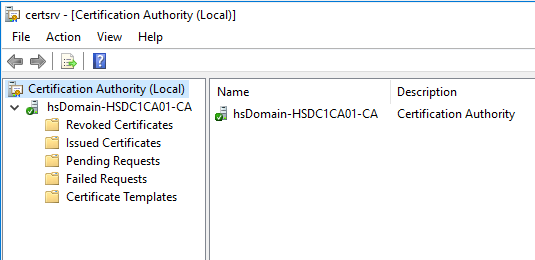
2.34. On the Subordinate CA, open the Certification Authority.

2.35. Select the certificate which was issued by the Offline CA and click Open.

2.36. Right-click server name and click Start Service

2.37. Green Check-mark indicates that the Subordinate CA is now online.
AND there you go! Your Microsoft Enterprise Root CA – Subordinate CA is ready to issue certificates.

Comments