
In this blog, I will describe the process of creating a Microsoft Root Certificate Authority – Standalone Offline CA.
Introduction
An Offline CA is required to authorize the Subordinate Server by issuing a Subordinate certificate to the Microsoft Enterprise CA, which will then issue the certificates to any entity that needs an SSL cert in the environment. Standalone Offline CA is not required to be up and running or connected to a network. In fact, it's a good security practice to have this CA not join to a Domain and does not need to be on the network either.
Well!! if this CA is not on the network, then how will it issue the certificates? Good question! and the answer is that as security best practice, the certificate request from the requesting device and is physically transported to the Offline CA, via USB drive or any other means of physical transport. Then the CSR is uploaded into the Offline Root CA, certificate is issued and downloaded on-to the transport media and transported to the requesting device. Then the certificate can be uploaded/installed on the device. Having the Root CA Offline, i.e., not on the Domain and not even on the Network protects it from being compromised.
Build and Configure Standalone Offline Root CA
Following are the steps involved in installing and configuration an Offline Enterprise Root CA: –
Create a configuration file (CApolicy.inf), which defines the settings which will be applied to the root CA certificate as well as to all other certificates issued by the root CA. Follow these steps to create the CApolicy.inf file: – Note: This configuration file has to be created before installing the Active Directory Certification Services.
Start Command Prompt as Administrator and run Notepad to create C:\Windows\capolicy.inf file.
Type the following parameters and values: –
[Version]
Signature=”$Windows NT$”
[Certsrv_Server]
RenewalKeyLength=4096
RenewalValidityPeriod=Years
RenewalValidityPeriodUnits=20
CRLPeriod=Years
CRLPeriodUnits=1
AlternateSignatureAlgorithm=0
LoadDefaultTemplates=0
2. Follow these steps to install Active Directory Certificate Services (AD CS) Role:
2.1. Open the Server Manager and Click on Add roles and features.

2.2. Click Next to continue with the wizard.

2.3. Select Role-based or feature-based installation and click Next.

2.4. Make sure the correct server is selected. Then click Next.

2.5. Select Active Directory Certificate Services

2.6. Click Add Features to accept the installation of required feature related to the selected role. Make sure Include management tools (if applicable) is selected.
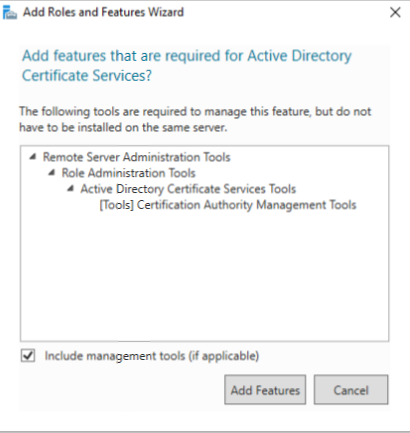
2.7. Click Next to continue.

2.8. For this purpose, you do not need to change anything here. Click Next.

2.9. Click Next to continue.

2.10. For the purpose of this installation you only need to select Certificate Authority and click Next.

2.11. Click Install to begin the Microsoft AD CS role installation.

2.12. Once the installation is finished, click on the link that says Configure Active Directory Certificate Services on the destination server to start the AD CS configuration process.

3. Following steps describe the AD CS configuration process: –
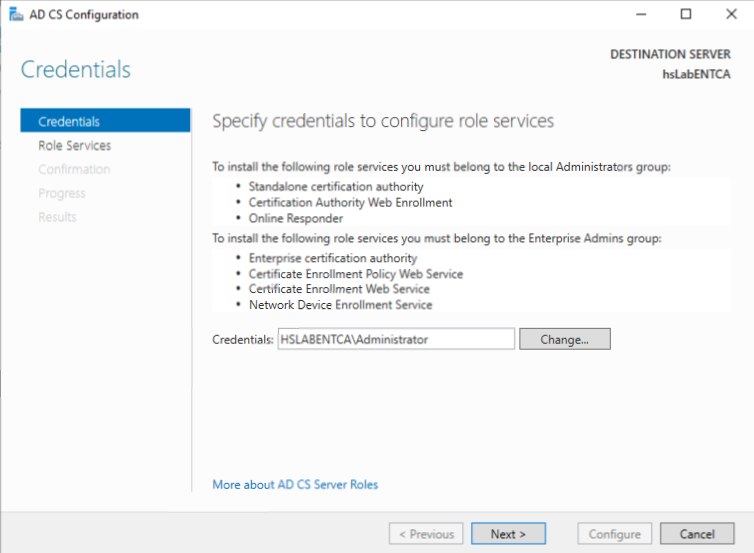
3.1. Specify the admin credentials and click Next.
3.2. Select Certificate Authority and Click Next. Only ‘Certificate Authority’ option should be available, since this was the only option selected during the installation.

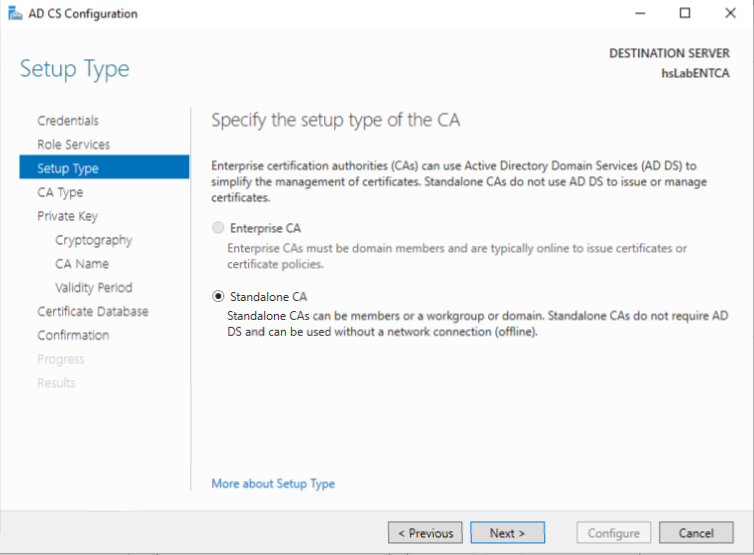
3.3. Only Standalone CA option is available, since this server is not joined to the Domain. Note: It is a security best practice for CA Root Server to NOT be joined to the Domain.
Click Next.
3.4. Select Root CA and Click Next. Note: This server will be the top level CA in the certification chain. Hence, Root CA needs to be selected at this screen.

3.5. Select Create a new private key option and click Next.

3.6. Change the Key Length to 4096 for stronger encryption and click Next.

3.7. No need to change anything here, unless there is a specific requirement to change the Name of this CA. Leave all defaults and click Next.

3.8. Leave default value of 5 years as the validity period OR you can change the value as per organizations requirements. Click Next.

3.9. Leave all defaults and click Next.

3.10. Verify the summary and click Configure.

3.11. Click Close to complete the wizard.

3.12. Start the Certification Authority management console.

3.13. Right-click on the server name and click on Properties.

3.14. Under Extensions tab, select ‘CRL Distribution (CDP)’ from the drop-down and remove all locations, except “C:\Windows\systems32\…”

3.15. Click Add and add the following location: –
Where <ServerDNSName> should be replaced by the Subordinate CA’s DNS name. Click OK.
Note: Refer to the blog post ‘Install and configure Microsoft Enterprise CA – Subordinate CA’ for details on install and configure AD CS Subordinate CA.

3.16. Select the highlighted options and click Apply.

3.17. No need to restart the services yet. Select No.

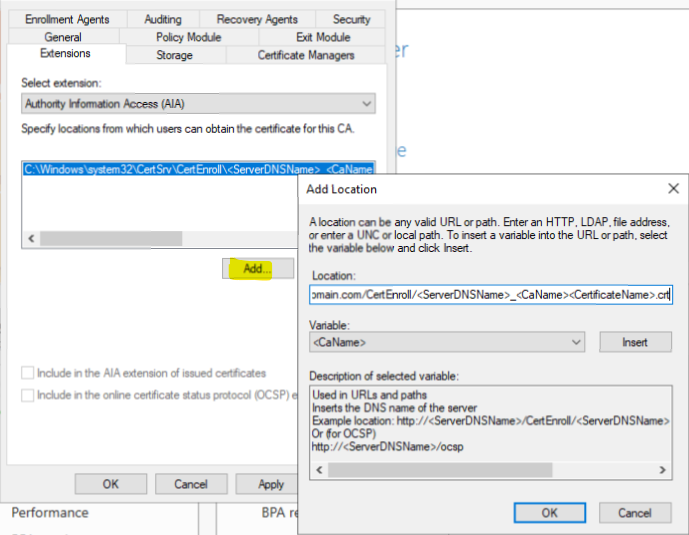
3.18. Still on the Extensions tab, select Authority Information Access (AIA) and remove all locations except ‘C:\Windows\System32…’
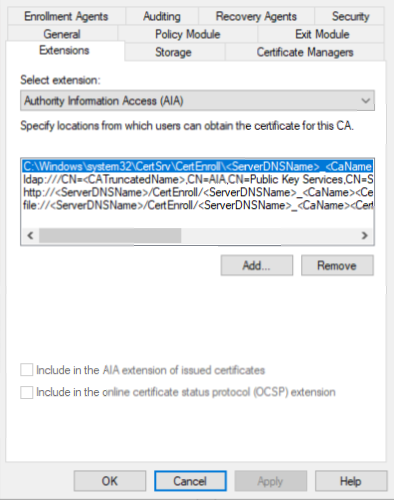
3.19. Click Add and add the following location: –
Where the <ServerDNSName> after https, should be replaced by the Subordinate CA’s DNS name.
Click OK.
3.20. Select the highlighted options and click Apply.

3.21. Click Yes to restart the services.

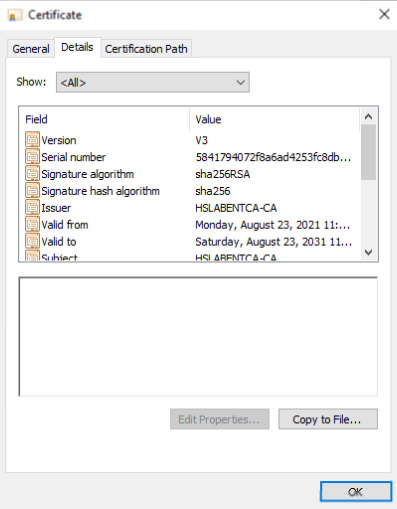
3.22. Go to General tab and click on View Certificate.

3.23. Go to the Details tab and click on Copy to File.
3.24. Click Next.
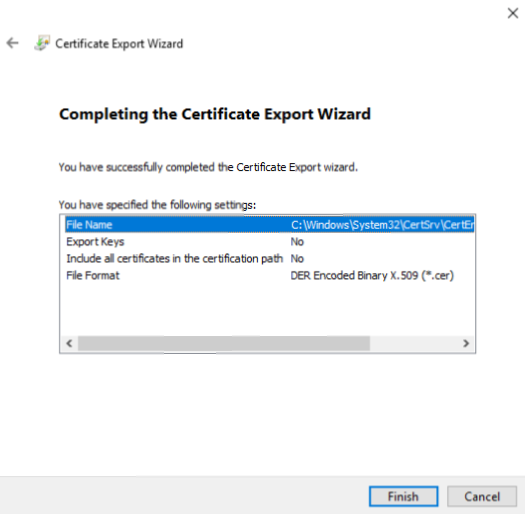
3.25. Select ‘DER encoded binary X.509 (.CER)’ and click Next.

3.26. Type the file name to save the exported cert.

3.27. Click Finish to complete the Export and finish the setup of Offline Root CA.
3.28. Reboot the server. Microsoft Root CA – Offline CA is ready for use.
Next Read - Microsoft Enterprise CA - Subordinate CA

Comments